Saving Christmas mood with Vision

I love winter holidays because of the special mystery mood these days. That’s why right after the 1st of January I tried to make this time last a bit longer. And now I want to share with you the way I did it, also introducing machine learning with Swift and Vision framework.
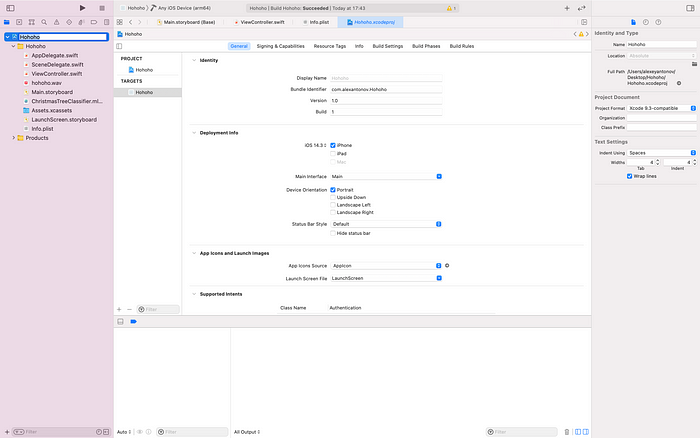
Let’s start! First, create a blank UIKit (Storyboard) project in Xcode.

Our goal is to make the app that differs Christmas tree from other stuff. For that particular reason we will train our machine learning model. But first, let’s find our content for the training.

After downloading some images (50 — 100 images for each category is quite good) for training I split all of them into this folder structure:

Folder “train” contains two folders with two types of images: Christmas tree and other stuff. I also created test folder with images for testing (usually 20% of training images is enough for testing). Next, let’s create our first ML model. For that, open CreateML app that you can access from the menu: Xcode -> Open Developer Tool -> CreateML. You will see a dialogue for creating new project.

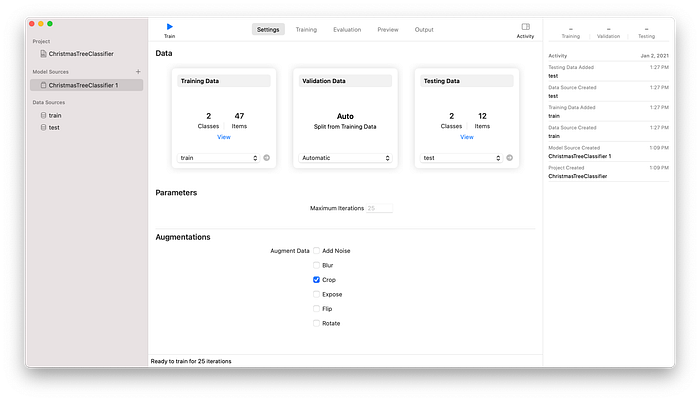
Choose a default “Image Classification” template, click “Next” button, enter the name of your classifier and create a project. The main screen is “Data”, and here you should choose your “train” folder in “Training Data” block and “test” folder for “Testing Data” block. I also selected Crop option just to be sure that it will detect a part of the Christmas tree. When you finish this, click “Train” button in upper left corner of the main screen.
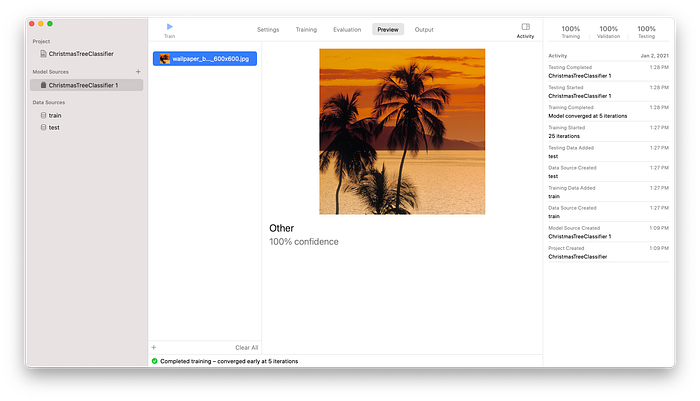
Here it is! Now your model is trained and works. Want to try? Well, click Preview tab on the main screen and drag-n-drop couple images into the screen. You will see class name (which is a name of the folder with images) and confidence.
Now, when you are sure that it works well, go to Output tab and click Get button to save your model. Add it to your Xcode project like you add all existing files and don’t forget to check the target and “Copy items if needed”. Ready to code? Well, wait… Let’s make some changes in settings and create a UI in Storyboard.
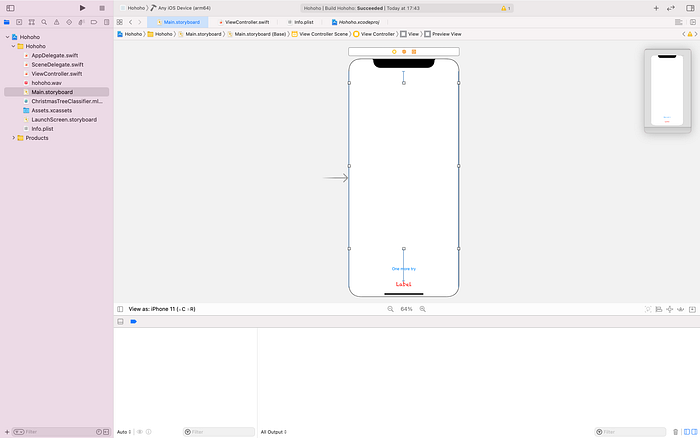
We will place UILabel, UIImageView and UIButton on the screen. Do all the work with AutoLayout and connect Label (outlet), Button (action) and ImageView (outlet) to your code.
@IBOutlet weak var classificationLabel: UILabel!@IBOutlet weak var previewView: UIImageView!@IBAction func oneMoreTry(_ sender: Any) {}
On the top of ViewController let’s import Vision and AVFoundation frameworks:
import Visionimport AVFoundation
And the first we should do is to show camera capture dialogue. For that, we will use UIImagePickerController with camera source type:
private func setupCamera() { let cameraPicker = UIImagePickerController() cameraPicker.sourceType = .camera cameraPicker.delegate = self self.present(cameraPicker, animated: true, completion: {})}
To transmit shot to the main ViewController, we will make it a delegate of the UIImagePickerController. And only after that we will present it modally.
Let’s write a boilerplate extension in order to make this ViewController a picker’s delegate:
extension ViewController: UIImagePickerControllerDelegate, UINavigationControllerDelegate { }Let’s call this function from the method of the View Controller life cycle called viewDidAppear. As it’s inherited from the base UIViewController class (OOP theory understanding is still one of the basic programming skills), we call first its superclass method:
override func viewDidAppear(_ animated: Bool) { super.viewDidAppear(animated)...
You may think that we can call setupCamera() function right below it, but… There’s a special thing in iOS that is called feature authorization. We should allow usage of camera, so let’s go first to Info.plist file and add there one property:

Then, under calling superclass viewDidAppear method, let’s write this chunk of code:
switch AVCaptureDevice.authorizationStatus(for: .video) { case .authorized: self.setupCamera() case .notDetermined: AVCaptureDevice.requestAccess(for: .video) { granted in if granted { self.setupCamera() } } default: return}
We will call setupCamera() function only if the user authorizes app to use the camera. Below we can also set up the default label text to tell the user what to do:
self.classificationLabel.text = "Find a Christmas tree"Connect your iPhone, hit “Run”, and you can see camera dialogue appearing after the app shows UI. Want to see the image in our ImageView? Okay! Let’s implement UIImagePickerController delegate method to take user’s picture to the ViewController. In the extension we wrote earlier now create this method:
func imagePickerController(_ picker: UIImagePickerController, didFinishPickingMediaWithInfo info: [UIImagePickerController.InfoKey : Any]) {let photo = info[UIImagePickerController.InfoKey.originalImage] as! UIImageself.previewView.image = photodismiss(animated: true, completion: nil)}
Rerun the app and try to use the photo taken in the dialogue. But after selecting the photo the dialogue opens again. Why is it happening?
The reason is that the viewDidAppear function is called every time the view shows, even after the modal view hides. So we can make a small hack to prevent it from reopening. Right after IBOutlets create a variable:
var isLoading = trueAnd then wrap authorization code into condition:
if isLoading { switch AVCaptureDevice.authorizationStatus(for: .video) { case .authorized: self.setupCamera() case .notDetermined: AVCaptureDevice.requestAccess(for: .video) { granted in if granted { self.setupCamera() } } default: return } isLoading = false}
Now it will be presented only after the app starts. And to retake a photo call setupCamera() function in the oneMoreTry method of button click:
@IBAction func oneMoreTry(_ sender: Any) { setupCamera()}
Although we can take photos and show them in UIImageView, it’s still not what we want in the first place. I’m sure you can’t wait for diving into Vision framework. Let’s create a VNRequest — request for image classification that will use our model. Write this code after creating isLoading variable:
var classificationRequest: VNRequest { let model = try! VNCoreMLModel(for: ChristmasTreeClassifier().model) let request = VNCoreMLRequest(model: model, completionHandler: { [weak self] request, error in self?.processClassifications(for: request, error: error)}) request.imageCropAndScaleOption = .centerCrop return request}
“Import” our model into Vision and create the request that uses our model and calls processClassifications function in our ViewController. Then set the option for cropping the photo and return the request as it is a computed variable.
The function processClassifications takes our VNRequest and error and sees the results of the image classification in the main queue (as we will update the UI). It takes the type of the result to the array of VNClassificationObservation to get all necessary data and checks the most confident type:
func processClassifications(for request: VNRequest, error: Error?) { DispatchQueue.main.async { guard let results = request.results else { self.classificationLabel.text = "Unable to classify image.\n\(error!.localizedDescription)" return } if let classifications = results as? [VNClassificationObservation] { if classifications.first?.identifier == "Christmas Tree" && classifications.first!.confidence > 0.9 { self.classificationLabel.text = "This is a Christmas Tree! HO-HO-HO!" } else { self.classificationLabel.text = "That's not a Christmas tree" } } }}
Based on the classification result, the function updates the label. But how can we trigger the Vision framework? Well, here we need to add some more code to UIImagePickerControllerDelegate function. After getting user’s photo insert the following:
...let photo = info[UIImagePickerController.InfoKey.originalImage] as! UIImageDispatchQueue.global(qos: .userInitiated).async { let handler = VNImageRequestHandler(cgImage: photo.cgImage!, orientation: .up, options: [:]) do { try handler.perform([self.classificationRequest]) } catch { print("Failed to perform classification.\n\(error.localizedDescription)") }}...
In a background queue we run VNImageRequestHandler by providing it with the photo, correct orientation and created request. Well, now we are ready. Run the app and try it out!
Nice, isn’t it? Let’s add even more! Do you like Santa telling “Ho-ho-ho”? Get a royalty-free sound effect (like that one: https://freesound.org/people/Intimidated/sounds/258227/), add it to the project and append an AVAudioPlayer. On the top of our ViewController insert the following code:
var audioPlayer: AVAudioPlayer?In the end of the viewDidAppear function now put in the player initialization:
do { try AVAudioSession.sharedInstance().setCategory(AVAudioSession.Category.playback) try AVAudioSession.sharedInstance().setActive(true) let path = Bundle.main.path(forResource: "hohoho", ofType:"wav")! let url = URL(fileURLWithPath: path) audioPlayer = try AVAudioPlayer(contentsOf: url) audioPlayer?.prepareToPlay()} catch { print(error.localizedDescription)}
That is how we set up the player and loaded a sound. Now it’s time to modify processClassifications function to add an audio message. Write this code right after changing label to the greeting:
...
self.classificationLabel.text = "This is a Christmas Tree! HO-HO-HO!"if !(self.audioPlayer?.isPlaying ?? true) {  self.audioPlayer?.play()}
...
Indeed, we are finished and full of mysterious Christmas mood. Share it with your friends! Merry Christmas and Happy New Year! 🎅🎄
P.S. You can find all the code here: https://github.com/iamalexantonov/Hohoho
